Minnie Mouse Scarf

So you can’t have a Mickey Mouse scarf without a Minnie Mouse.  The elements that shout Minnie to me are polka dots, frilly skirts, bows and a tail.  Have fun crocheting!

Need:

H Hook

12″ Polka Dot Ribbon

Less than 1 skein each of Hobby Lobby I Love This Yarn in:

Red

White

Black

Body:

With red, Ch 18

Row 1:  In 3rd ch from hook, dc in each ch across.  (16 dc)

Row 2-100:  Ch 2, dc across.  (16 dc)

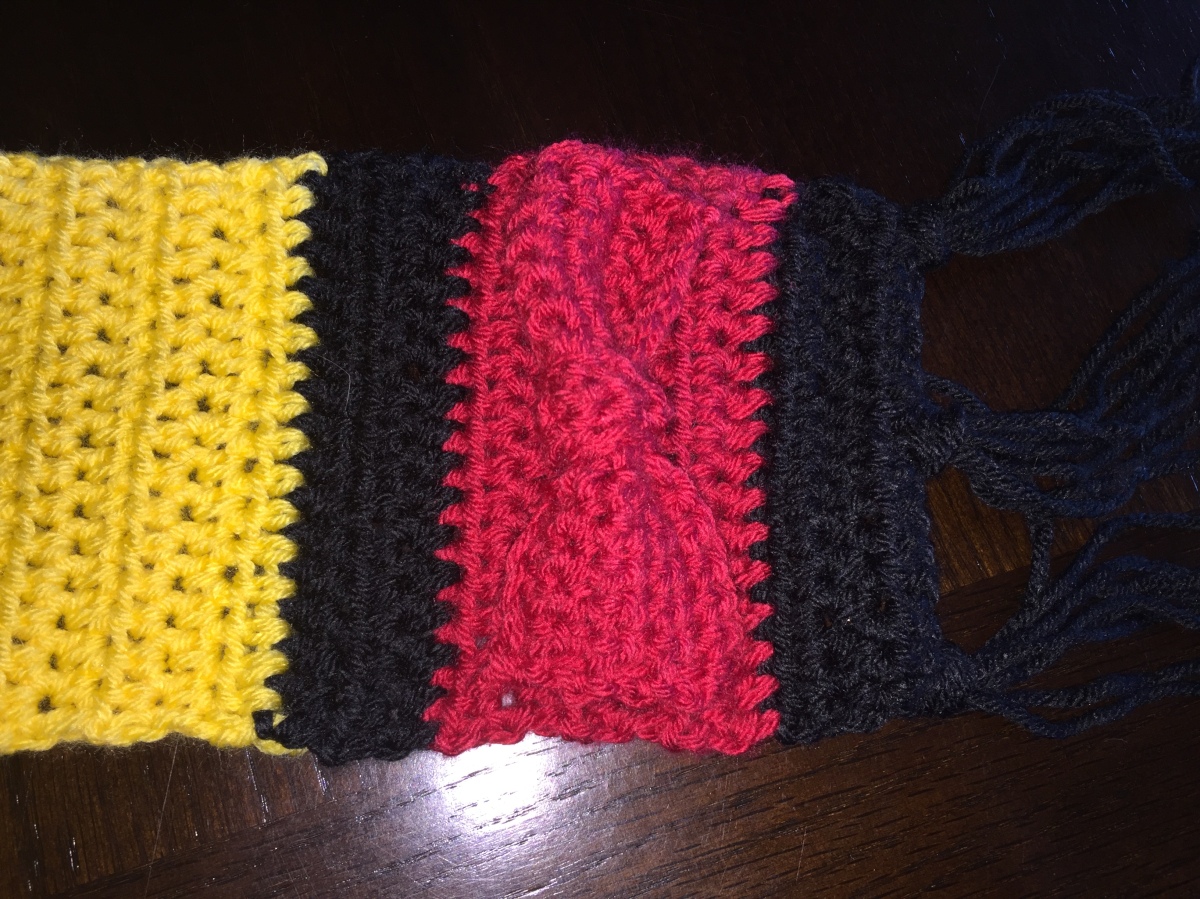
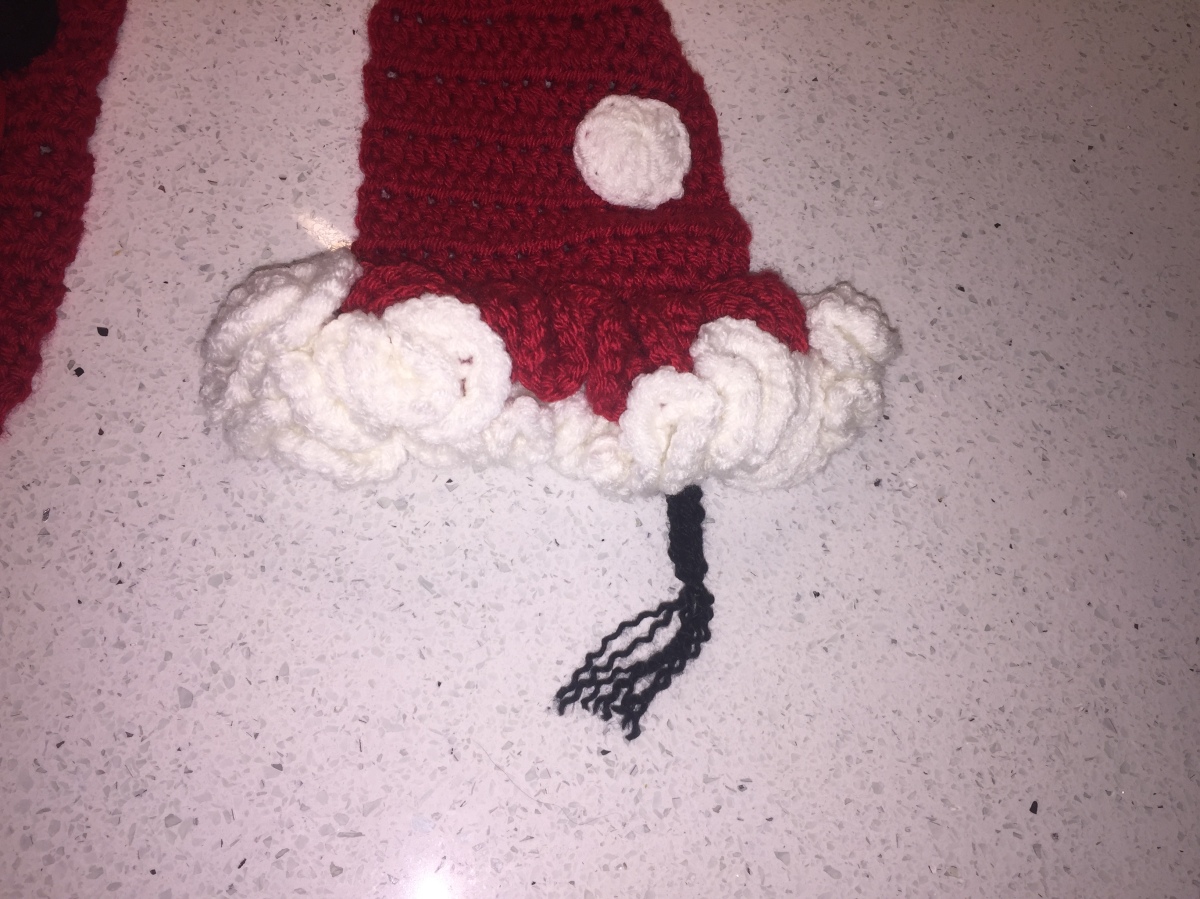
Row 101 (a):  Ch 1, in front loops only, 3 sc in each dc across.  (48 sc)

Row 102 (a):  Ch 1, 3 sc across.   Finish off.   (144 sc)

Row 101 (b):  Attach white yarn.  Ch 1, in back loops only, 3 sc in each dc across.  (48 sc)

Row 102 (b):  Ch 1, 3 sc across.  Finish off.  (144 sc)

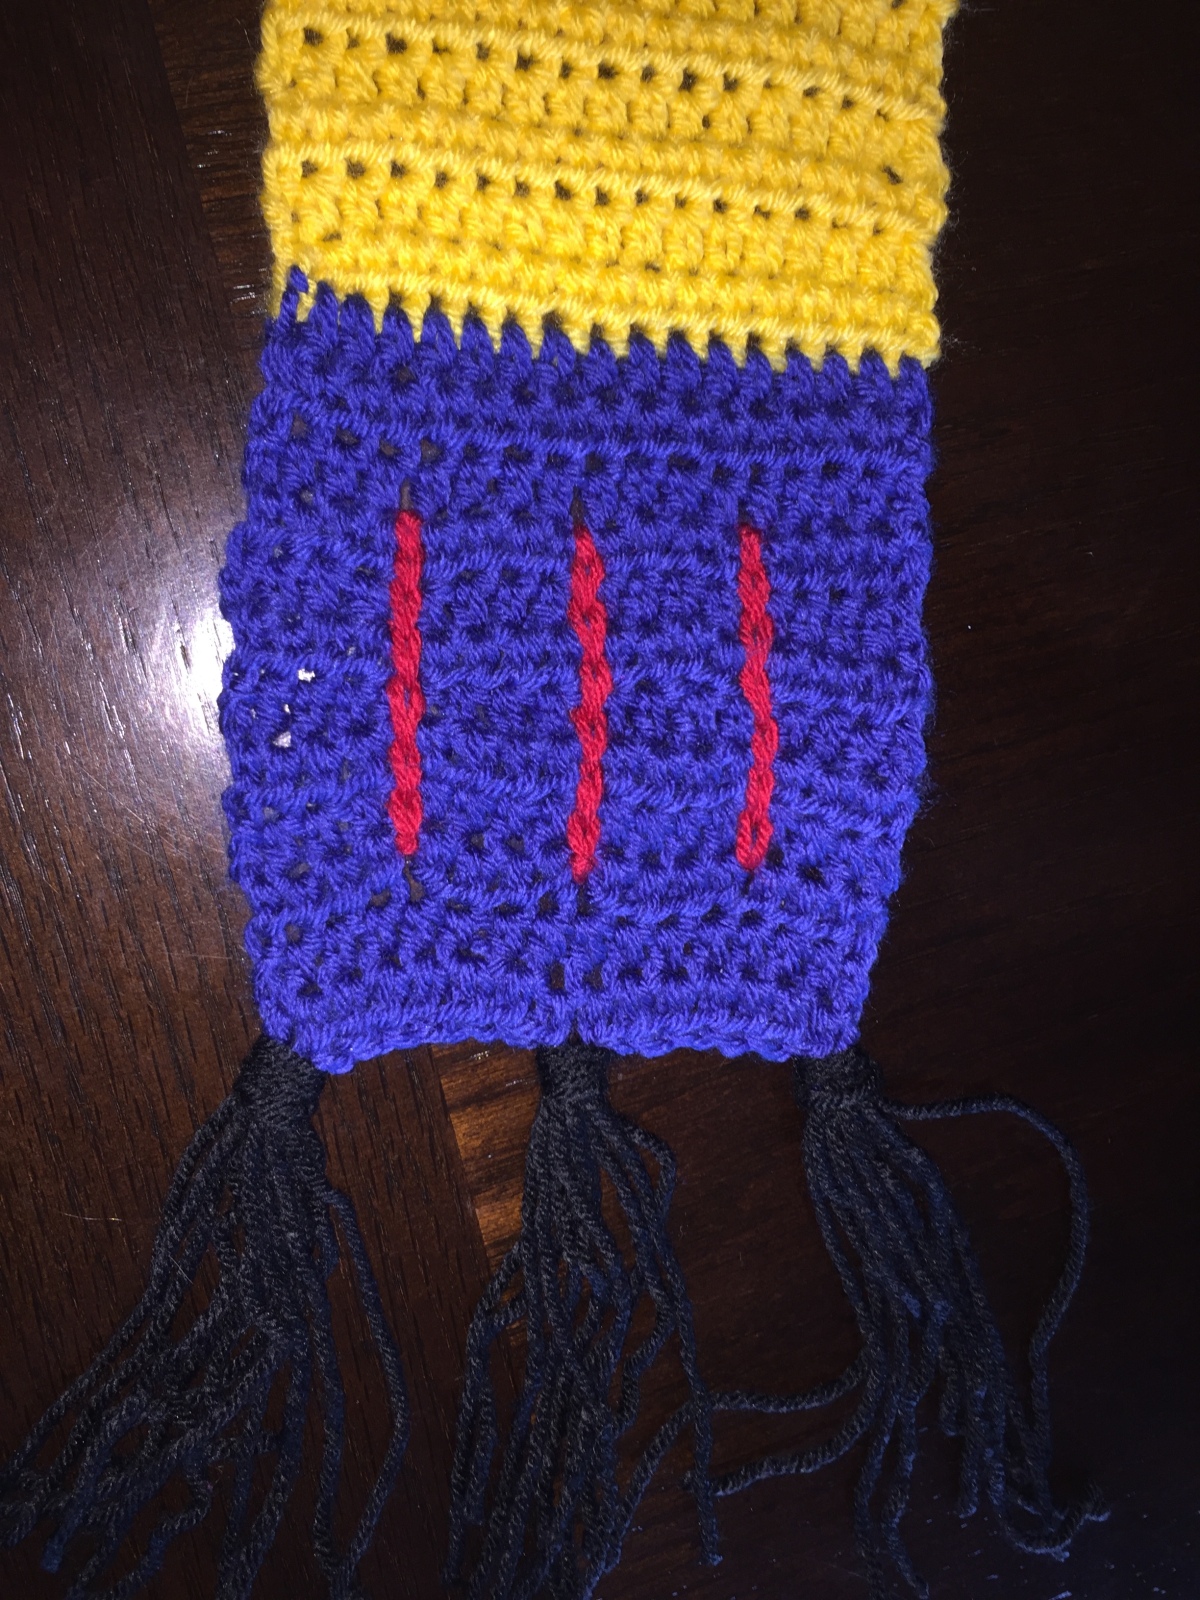
With black, ch 15.  Sc into the middle of the scarf on the white side.  Continuing along the black ch, sl st into each ch.  Finish off.  Separate the fibers at the end of the yarn.

img_0977

Icon:

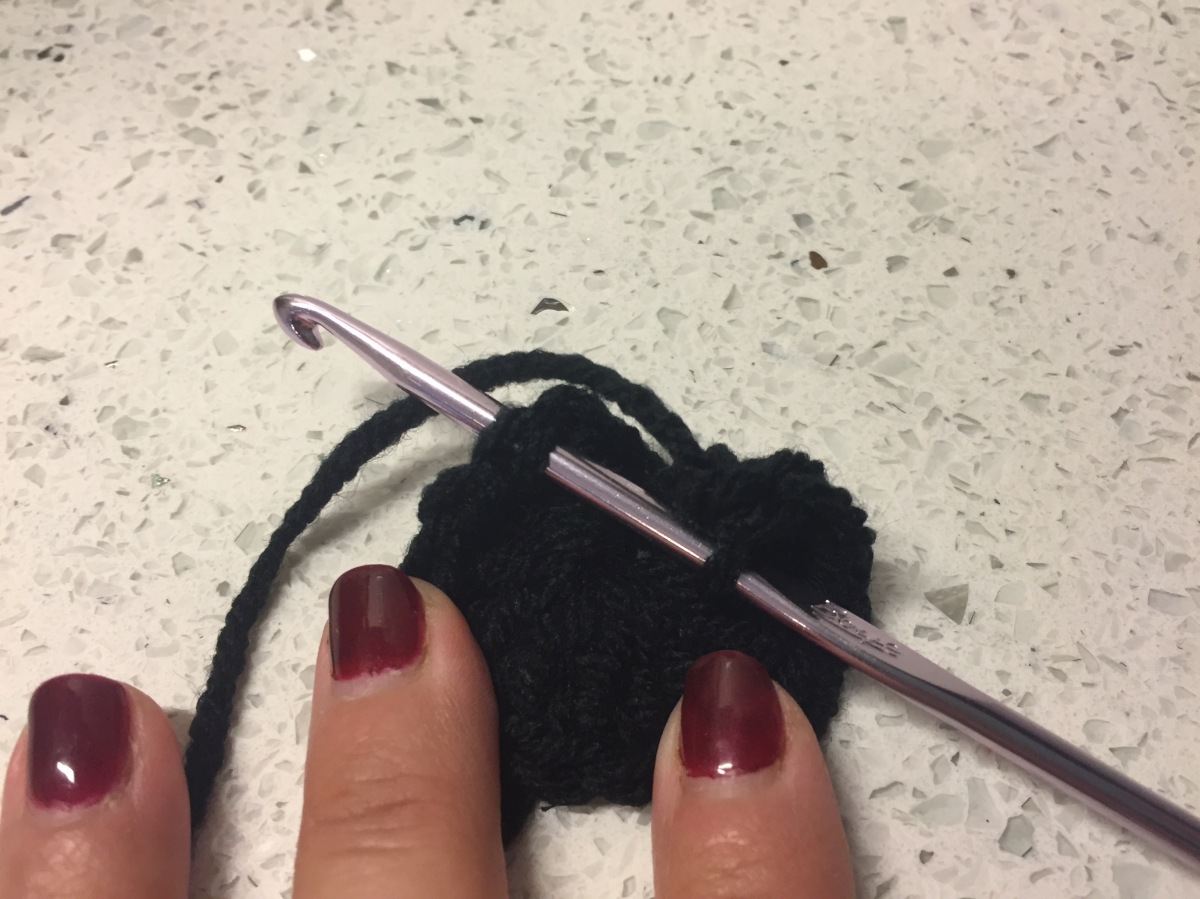
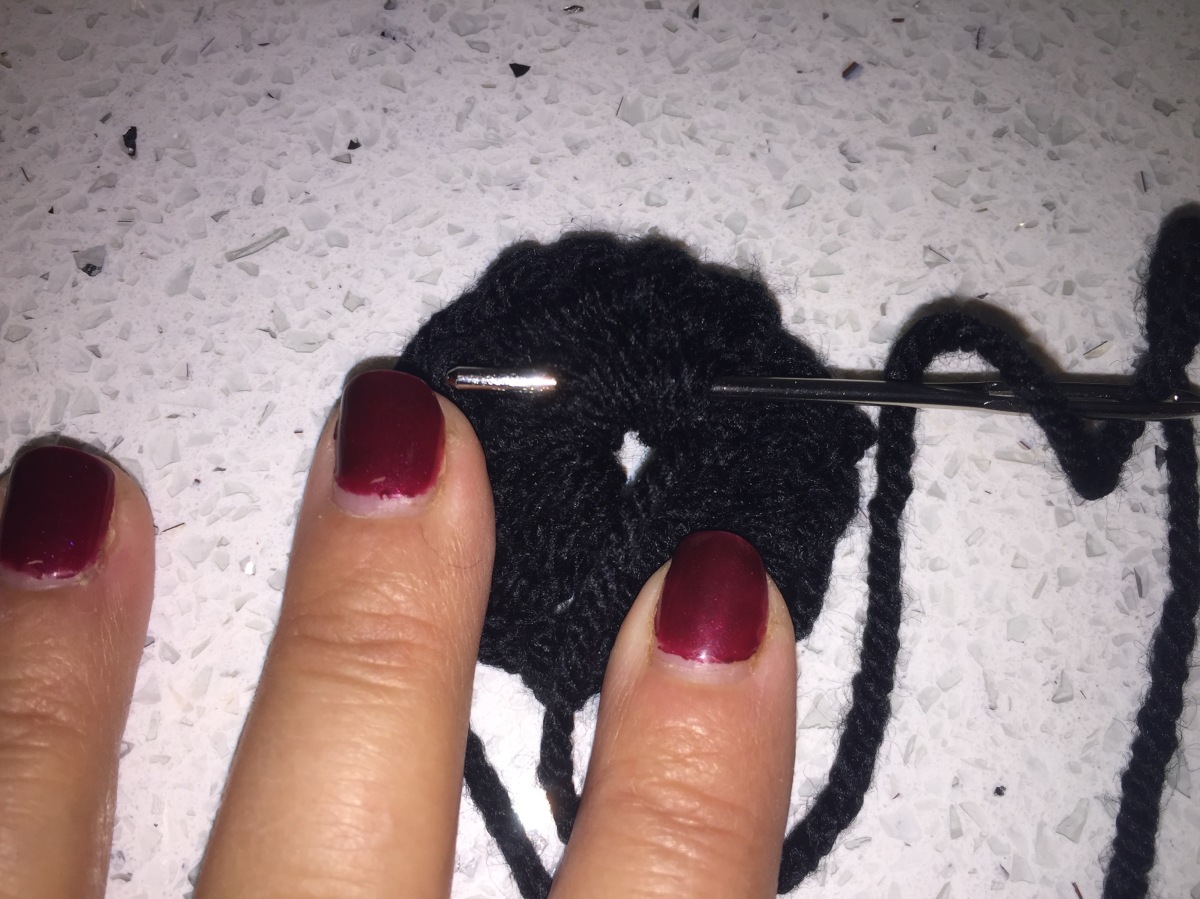
Head:  With black, make a magic circle.  Ch 2, 10 dc in magic circle.  Join with a sl st to 1st dc.  Ch 2, 2 dc in each dc around.  Join with a sl st to 1st dc.  Finish off leaving a long tail.

Ears (make 2):  With black, make a magic circle.  Ch 2, 10 dc in magic circle.  Join with a sl st to 1st dc.  Finish off leaving a long tail.  Sew ears to head with your long tails.  Make sure to tie in your beginning tails tightly so they don’t unravel in the wash.

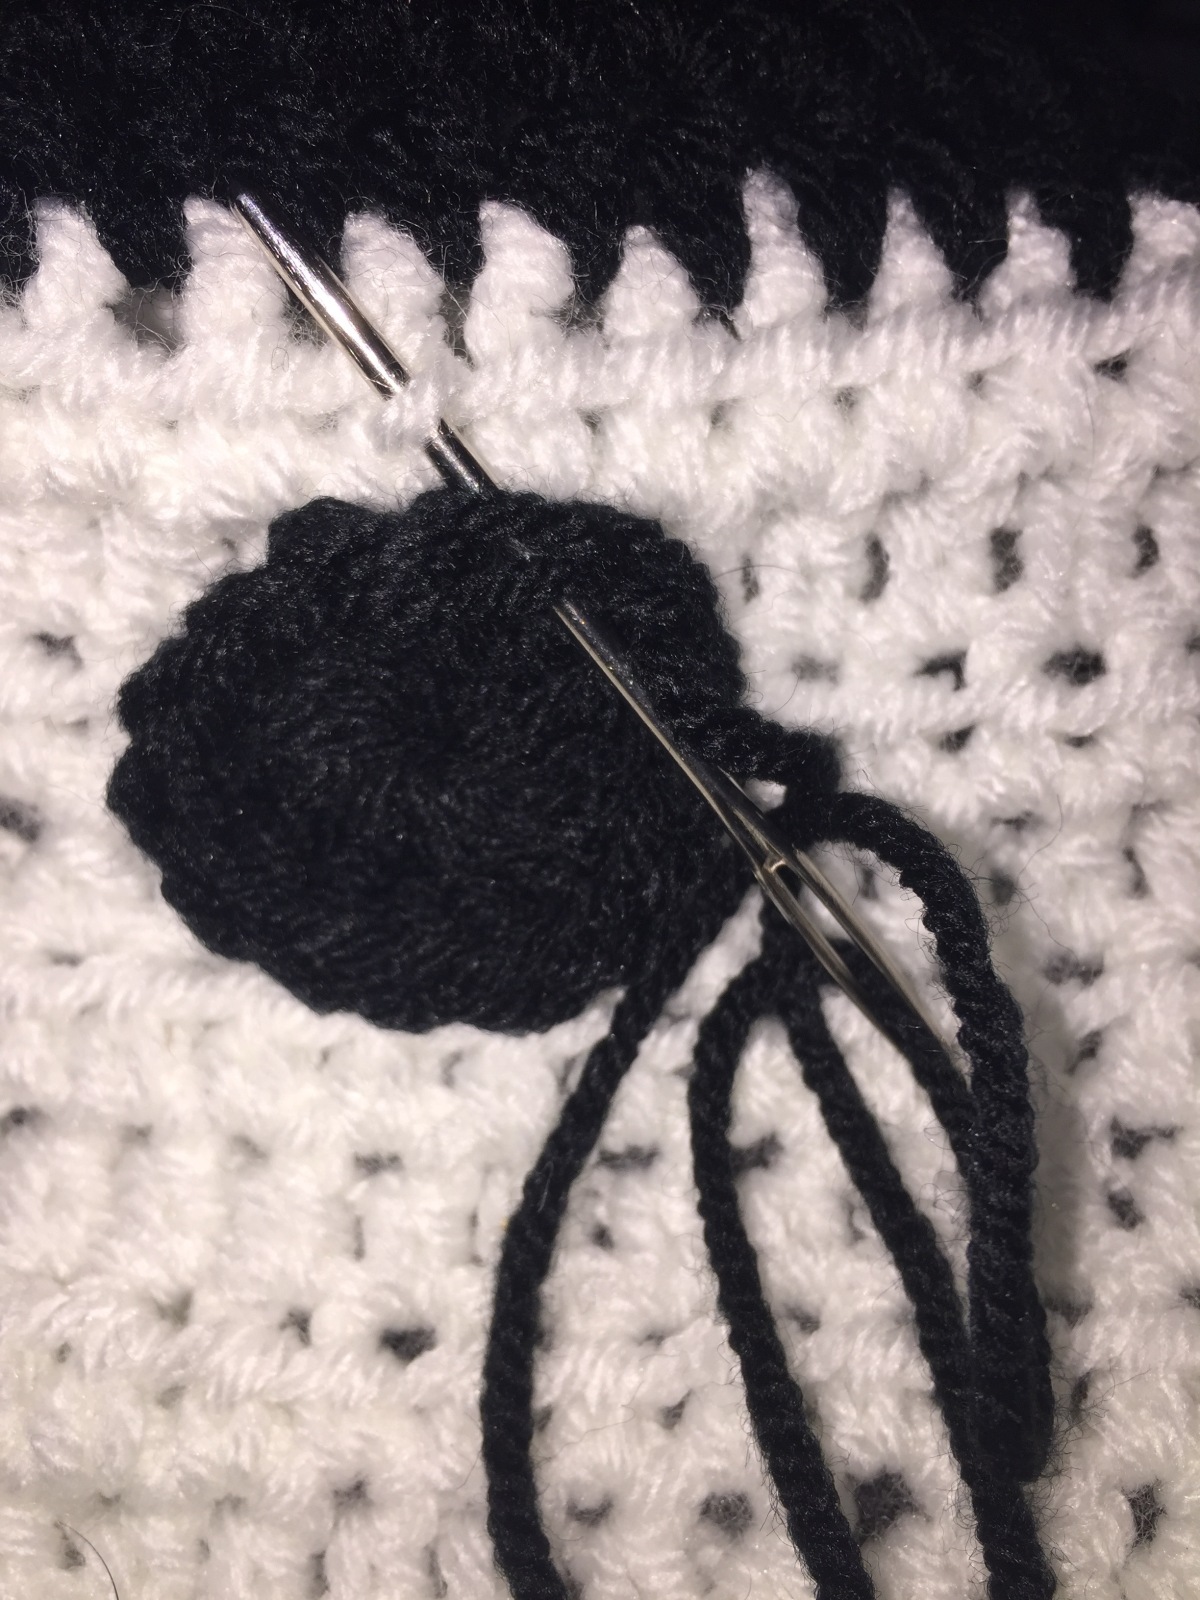
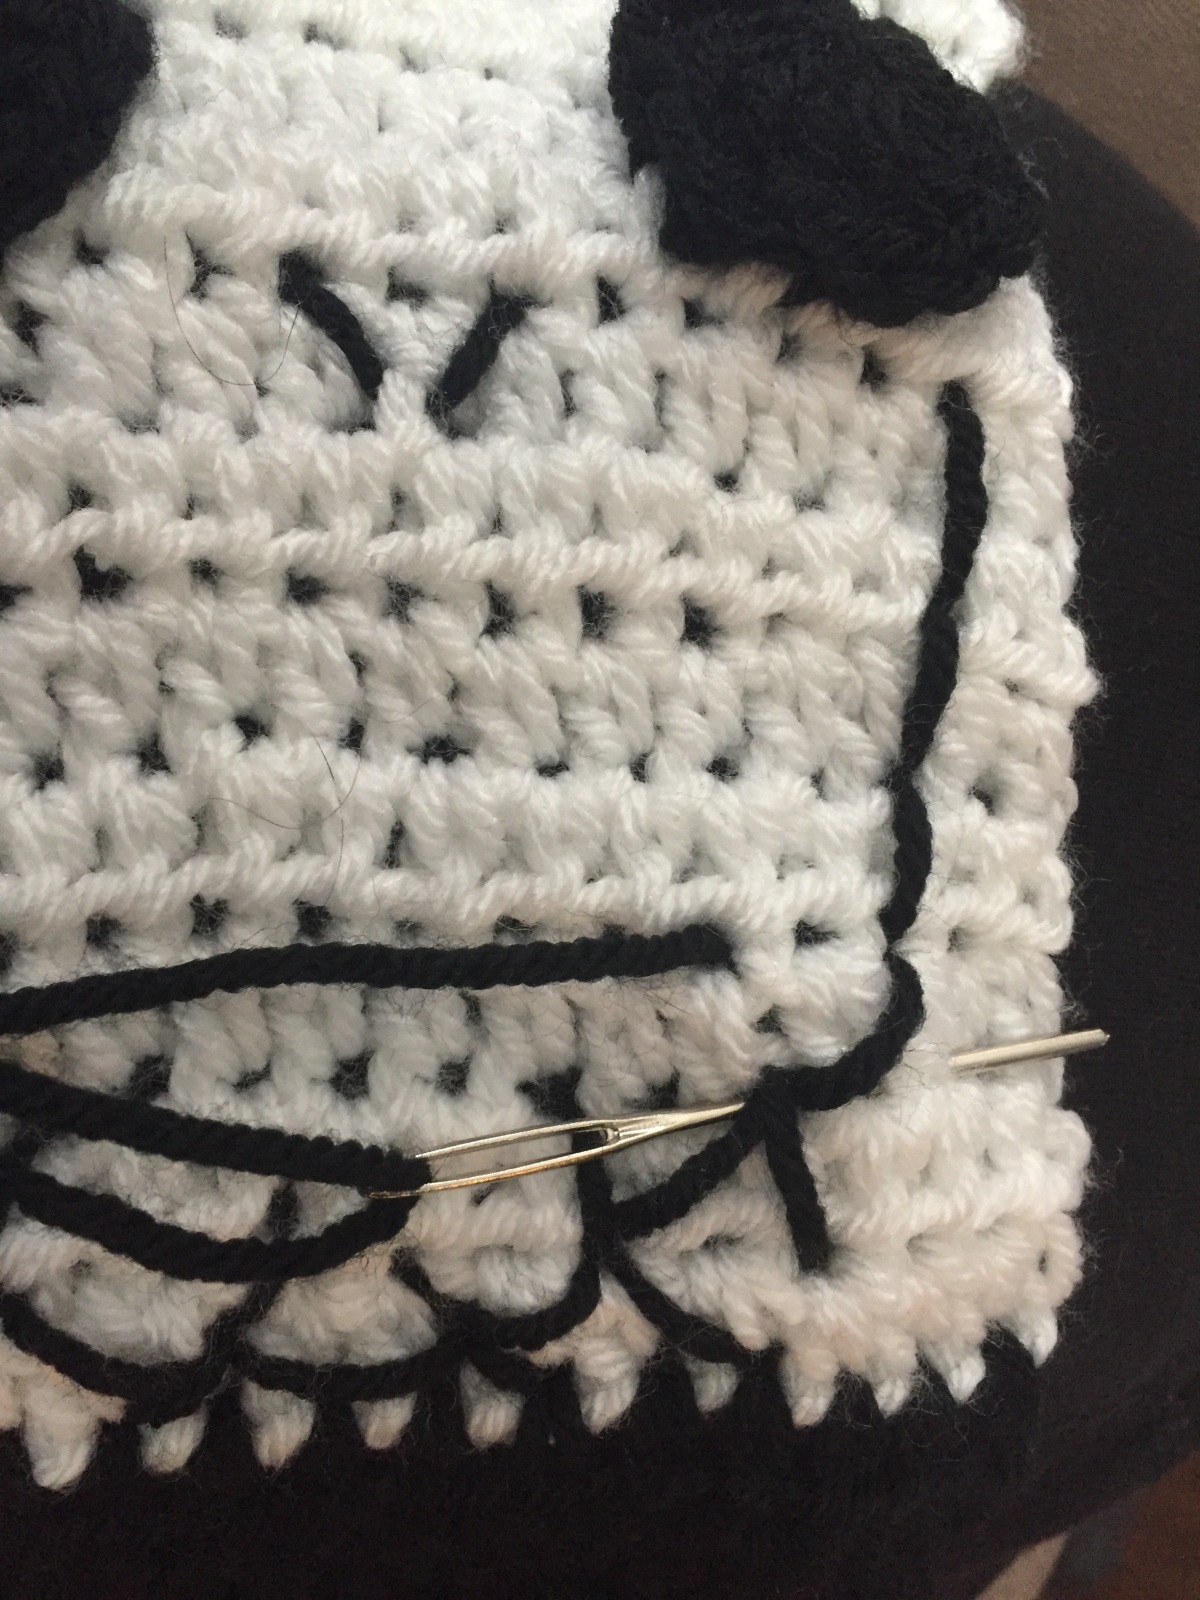
Sew the entire head and ears onto the opposite end of your scarf from your skirt end.  Make sure you’re sewing on the red side.  The white should just be a peek-a-boo from underneath.  Tie ribbon on.


img_0976

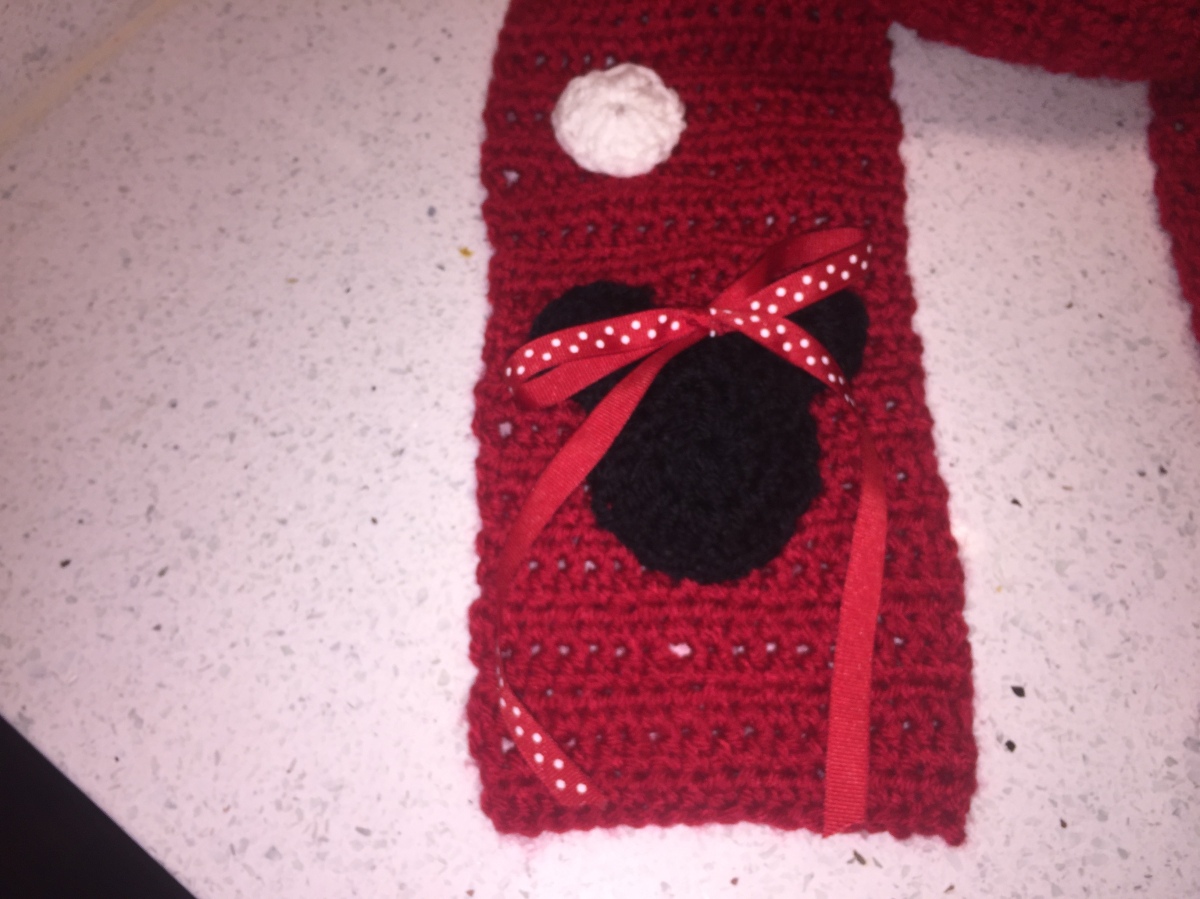
Polka Dots:  make a magic circle.  Ch 2, 10 dc in magic circle.  Join with a sl st to 1st dc.  Finish off leaving a long tail.  Using the long tail, sew onto the body of the scarf randomly.  Again, make sure you’re sewing on the red side.

Congratulations!


Seahawks!

Seahawks 1
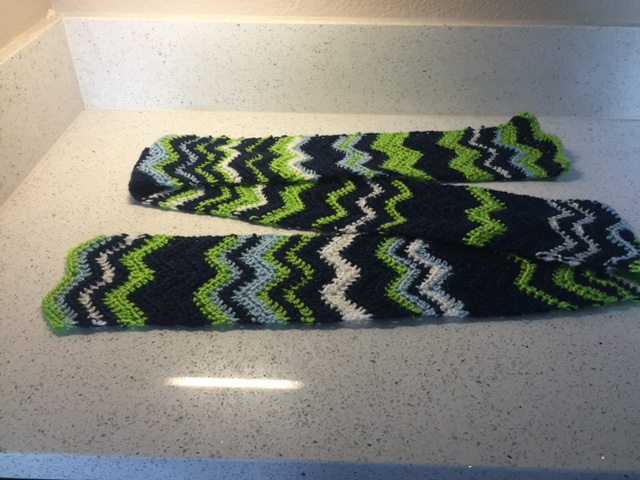
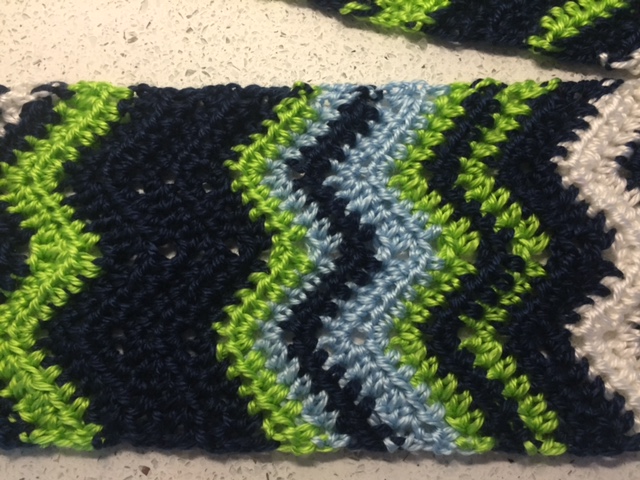
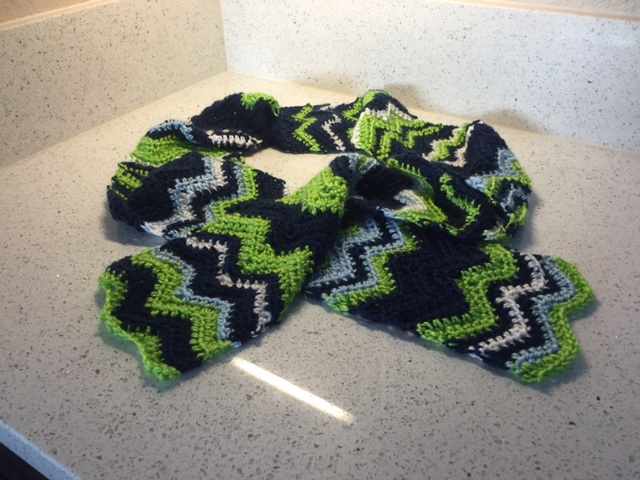
I’ve been thinking about some scarves for football season lately.  A mom friend, my daughter’s friend’s mom, asked me for something Seahawks to wear for work.  I couldn’t wait.  I’ve also been wanting to do a chevron scarf.  I haven’t been happy with any of the patterns I’ve found.  They all had problems, too wide, not pointy enough, etc…  I think I finally got the pattern to where I wanted it.  I used a stripe generator for the great Seahawk colors and to make it fun.  I used the Hobby Lobby Yarn Bee Soft Secret so it was a little lighter for her to wear as an accessory rather than to keep warm.

You’ll need:

Size H Hook

Less than 1 skein each of Hobby Lobby Yarn Bee Soft Secret in Navy, Lime, White and Sky Blue

Seahawks 3

Ch 25

Row 1:  Hdc in 2nd ch from hook.  Sk next ch.  Hdc in next 4 ch.  3 hdc in next ch.  Hdc in next 4 ch.  Sk next 2 ch.  Hdc in next 4 ch.  3 hdc in next ch.  Hdc in next 4 ch.  Sk next ch.  Hdc in last ch.  Turn

Row 2-150: Ch 1.  Hdc in same stitch.  Sk next hdc.  Hdc in next 4 hdc.  3 hdc in next hdc.  Hdc in next 4 hdc.  Sk next 2 hdc.  Hdc in next 4 hdc.  3 hdc in next hdc.  Hdc in next 4 hdc.  Sk next hdc.  Hdc in last hdc.  Turn

To change colors, pull up new color on the last part of your last hdc.  Continue with your new color.  Weave in your ends as you go.

To turn it into an infinity scarf, sl st ends together.

Seahawks 4

Nightmare Before Christmas

Version 2
Jack Skellington

One of my first scarves, and still one of my most popular was this Jack Skellington, Nightmare Before Christmas scarf.  It’s lots of fun and easy to do.  Jack is a unique character and always looks different.  This is what makes his face easy to replicate.  Of course this scarf is only inspired by the real Jack Skellington!

Needed:

Less than one skein each of black and white Hobby Lobby I Love This Yarn

H Hook

Body:

Row 1:  In black, ch 18.  Hdc in 3rd ch from hook.  Hdc in each ch across.  (16 hdc)

Rows 2-3:  Ch 2, hdc across (16 hdc)

Row 4:  Change to white, ch 2, hdc across (16 hdc)

Rows 5-15:  Ch 2, hdc across (16 hdc)

Row 16:  Change to black, ch 2, hdc across (16 hdc)

Rows 17-18:  Ch 2, hdc across (16 hdc)

Row 19:  Change to white, ch 2, hdc across (16 hdc)

Row 20-21:  Ch 2, hdc across (16 hdc)

Continue in this manner, in stripes of black and white, 3 rows of each color for a total of 39 stripes.  You should end on another black stripe.

Row 133:  Change to white, ch 2, hdc across (16 hdc)

Row 134-144:  Ch 2, hdc across (16 hdc)

Row 145:  Change to black, ch 2, hdc across (16 hdc)

Row 146:  Ch 2, hdc across (16 hdc)

Row 147:  Ch 2, hdc across, finish off.  (16 hdc)

Faces:

IMG_0553
Jack’s two faces

Make 4 eyes:  With black, in a magic circle, ch 2, 13 dc.  Close with a sl st in top of 1st dc.

Version 2

Leave a long tail for sewing on eye and making nose and mouth.  Cinch your magic circle and tie a not in that tail to a dc.

IMG_0546
Knotting the in the dc

Sew 1st eye to the white block on the end.

Version 2
Sewing on Jack’s Eye

Use the tail of the first eye to make the nostrils.

Nostrils should not be parallel but they should be a little farther apart on the top than the bottom.

Use the extra long tail of the second eye to make his crooked smile.  His smile is crossed as well.  I make the entire smile and then go back to cross it.

IMG_0551

Make sure you knot your tail to part of the back before you hide your ends otherwise one good pull and Jack’s smile is gone!

Repeat this process for the other end of the scarf.  Be sure they are both on the side.

Fringe:

I make 3 groups of fringe on each end, 6 groups total.  For each group, cut 3 lengths each of black and white yarn to 12″, 6 strands total for each group.  Loop each group in half and attach to both ends of the scarf.

Have fun with him.  He’s a great character.

Snow White

Snow White is another super simple pattern.  It’s again done in a basic hdc.  It goes fast but winds up being just adorable.  You’ll feel like a princess.

Yarn:  Hobby Lobby – I Love This Yarn!  Less than one skein each of Yellow, Black, Blue and Red.

Hook:  H

Row 1:  With Black, ch 18.  Hdc in 3rd ch from hook.  Hdc across.  (16 hdc)

Rows 2 & 3:  ch 2, turn, hdc across (16 hdc)

Row 4:  Change to red.  Ch 2, turn, hdc across (16 hdc)

Rows 5-9:  Ch 2, turn, hdc across.  (16 hdc)

Row 10:  Change to black.  Ch 2, turn, hdc across (16 hdc)

Rows 11 & 12:  Ch 2, turn, hdc across (16 hdc)

Row 13:  Change to yellow.  Ch 2, turn, hdc across (16 hdc)

Rows 14-138:  Ch 2, turn, hdc across (16 hdc)

Row 139:  Change to blue, ch 2, turn, hdc across (16 hdc)

Rows 140-150:  ch 2, turn, hdc across (16 hdc)  Fasten off

Bow:

Row 1:  Start with a long tail.  Ch 15, sc in 2nd ch from hook.  Sc across.  (14 sc)

Row 2- 8:  Ch 1, sc across (14 sc)  Fasten off leaving a long tail.

Center Tie:

Row 1:  Ch 7, sc in 2nd ch from hook.  Sc across. (6 sc)

Rows 2 & 3:  Ch 1, turn, sc across.  (6 sc)  Fasten off leaving a long tail.

With the long tail of the center tie, sew the center tie around the bow.  Use the same long tail to tack the bow to the center of the red portion of the scarf.  Use the long beginning and ending tails to tack the corners of the bow to the scarf in the red portion.

Snow White Hair

On the blue end, using red yarn, pull up a loop in the center.  Make 7 chains of red through the blue.  Make another stripe on each side of that one, approximately 4 hdc’s away.

Snow White Sleeve

Weave in loose ends.

Fringe:

For each bunch of fringe, cut 10, 12″ lengths of black yarn.


Nemo Scarf

Nemo Scarf

I thought for a long time on how to represent Nemo.  I wanted a scarf to represent him specifically. I didn’t just want a clown fish. What makes Nemo  special?  His lucky fin. What makes this scarf special?  Lucky fringe.  It’s the little detail that will make Nemo lovers fall in love with this scarf.

Nemo Both Fringes

Hobby Lobby I Love This Yarn comes through for me again but use whatever brand you’re comfortable with. Remember to work in your ends as you go or you’ll have a lot of work at the end.

You will need:

H hook

1 skein Orange yarn

Less than 1 skein each of Black and White yarn

Row 1:  With Orange, ch 18, hdc in 3rd ch from hook. Hdc in next 15 ch (16 hdc)

Rows 2-5:  Ch 2, turn, 16 hdc.

Row 6:  Change to White, ch 2, turn, 16 hdc.

Row 7:  Change to Black, ch 2, turn 16 hdc.

Rows 8 & 9:  Ch 2, turn, 16 hdc.

Row 10:  Change to White, ch 2, turn, 16 hdc.

Repeat color pattern for 155 rows. You should end with an Orange stripe.

Lucky Fringe:

Make 3 groups of fringe for each side. The first side lengths should be cut to 12″ and the second sore should be cut to 6″.  For each group use 5 strands of Orange, 3 Black, and 2 White. Attach 3 groups to each end.

Nemo Lucky FringeNemo Regular Fringe

Cheshire Cat Scarf

This is by far my most popular scarf. I don’t know if it’s the great colors or the popularity of the character. The Cheshire Cat lends himself to simple but very recognizable motifs. I like it because I don’t have a lot of counting to do. Make sure you work in your loose ends as you go.  It will save you lots of time and headaches in the end.

Cheshire Cat Scarf

You will need an H crochet hook and less than one skein each of Hobby Lobby I Love This Yarn in:

  • Hot Rose
  • Mulberry
  • White

Scarf Body:

Row 1:  With Hot Rose, ch18.  Hdc in 3rd ch from hook. Hdc in next 15 ch.  Turn

Row 2:  Ch 2.  Hdc in next 16 Hdc. Turn.

Row 3:  Repeat row 2.

Row 4:  Change to Mulberry. Repeat row 2.

Row 5:  Repeat row 2.

Row 6:  Repeat row 2.

Row 7:  Change to Hot Rose.  Repeat row 2

Continue until you have 50 3-row alternating stripes, 150 rows.  Finish off.

Smile: (make 2)

Ch 21.  Sl st in 2nd ch from hook.  Sl st, 2 sc, 2 hdc, 2 dc, 4 tr, 2 dc, 2 hdc, 2 sc, 2 sl st.

Finish off leaving a long tail for sewing.

Cheshire smile

Finishing:

Sew 1 smile to each end of scarf.

Fringe:

In both Hot Rose and Mulberry, cut 30 strands of yarn to 12″. Use 10 strands for each group.  On the end of the scarf ending with Hot Rose, attach 2 groups of Mulberry and one of Hot Rose.  On the end of the scarf ending with Mulberry, attach 2 groups of Hot Rose and one of Mulberry.

Cheshire ends

Mickey Icon Scarf

Pink Ombré Mickey Icon We took a little hiatus to Vegas last week. I thought I could get this scarf done in the six hour round trip. I dropped my needle half way and couldn’t find it anywhere in the car. My husband did not like the idea of stopping at a craft store on the road. So this one took a little longer than I planned. Personalization comes naturally to this pattern. I started with a rainbow scarf which has inspired many more palettes. My current favorite is this pink ombré. I’ve been using Hobby Lobby I Love this Yarn in Pastel Tweed for lots of my ombré work. It blends perfectly with pinks, blues and yellows. The patriotic palette is fun but Independence Day is usually a bit warm for scarves. Christmas and Fall also offer great choices.

Patriotic Mickey IconRainbow Mickey Icon

I generally use 18 icons.  The ombré has 16.  I started and ended with Hot Rose.  Be flexible and adapt it to your own colors.

Ombré Pallette

I used less than one skein each of Hobby Lobby I Love This Yarn in:

  • White
  • Pastels Tweed
  • Soft
  • Pink
  • Hot Rose

Head: Start with a magic circle, ch 2, 12 dc inside the magic circle. Join with sl st in top of 1st dc. (12 doc) Slip stitch

Ch 2. 2 dc in each dc around. Join with sl st in top of 1st dc. (24 dc)

Ch 2.  *2 dc in 1st dc, 1 dc in next dc. * Repeat *-* 11 more times. (36 dc)

Leave a long tail and finish off. Pull magic circle tight. Run that tail under half of the circle.

Magic circle closure

Tie tail to the piece and continue to run it under the other half of the circle. Cut tail.

Magic circle tieMagic circle finishing

Ears:

Start with a magic circle, ch 2, 12 dc inside the magic circle. Join with sl st in top of 1st dc. (12 doc)

Ch 2. 2 dc in each dc around. Join with sl st in top of 1st dc. (24 dc)

Leave a long tail and finish off. Pull magic circle tight. Run that tail under half of the circle. Tie tail to the piece and continue to run it under the other half of the circle. Cut tail.

Joining:

With long ending tail, sew one ear piece to the head piece with 4 stitches.

Tie tail to the piece and weave in end.

Ear tie offEar tail

Leave a 4 stitch space. Sew second ear piece to the head piece with 4 stitches.

Ear space

With the next head, count up from the stitching inside the first ear. 6 stitches up, start sewing head to the ear with 4 stitches.

Head to ear

Run yarn under 2 stitches of the head.

2 stitch space

Make 2 stitches, head to head, between the ears. Run yarn under 2 stitches of the head. Count up 2 stitches of the second ear.

Head to head

Sew head to the 2nd ear with 4 stitches. Tie tail to the piece and weave in end.

Fold piece in half. At the top of the head, leave a 4 stitch gap and start sewing your next set of ears.

Centering ears

Repeat these sequences until it’s long enough for you

Eeyore

I love Disney!  I love crocheting!  Nothing makes me happier than doing both at the same time.  I’m not employed or licensed by Disney.  I’m just inspired by my favorite characters, movies and places.  I sell my finished products, mostly to support my yarn addiction.  I’m happy to share my patterns for free.  I hope you have a great time crafting and that you’re inspired to create some of your own designs.  Be creative and use these patterns as guidelines.  I’d love to see everyone else’s finished items and whatever you’re inspired to make.

Eeyore Full Length With Ribbon

The Eeyore scarf is a great starter project for beginners.  He’s subtle and goes with lots of outfits.

I mostly use Hobby Lobby I Love This Yarn.  It has a great soft texture while still being easy to care for.  The price is great and luckily a Hobby Lobby just opened up nearby.

You’ll need:

  • Less than one skein of Hobby Lobby I Love This Yarn Greybeard
  • Less than one skein of Hobby Lobby I Love This Yarn Graphite
  • Less than one skein of Hobby Lobby I Love This Yarn Black
  • Size H Crochet Hook
  • 18″ of Pink 3/8″ Grosgrain Ribbon
  • 1″ White Button

Main Scarf:

Row 1:  Chain 18.  Hdc in 3rd ch from hook.  Hdc in next 15 ch.  Ch 2.  Turn

Rows 2-125:  16 hdc.  Ch 2.  Turn

Row 126:  14 hdc.  Hdc2tog. Ch 2.  Turn

Row 127:  Sk 1st hdc.  Hdc2tog.  12hdc.  Ch 2.  Turn

Row 128:  10 hdc.  Hdc2tog.  Ch 2.  Turn

Row 129:  Sk 1st hdc.  Hdc2tog.  8 hdc.  Ch 2.  Turn

Row 130:  Hdc 6, Hdc2tog.  Ch 2.  Turn

Row 131:  Sk 1st hdc.  Hdc2tog.  4 hdc.  Ch 2.  Turn

Row 132: Hdc 2. Hdc2tog.  Ch 2.  Turn

Row 133:  Hdc2tog.  Finish off

Eeyore Mane Without Fringe

Tail:

Row 1:  Ch 8.  Dc in 3rd ch from hook.  Dc in next 5 ch.  Ch 2.  Turn

Row 2-11:  Dc 6.  Ch 2. Turn

Row 12:  Dc 6. Finish off.

Eeyore Tail Without Fringe

Finishing:

Cut 16 strips of black yarn to 12″ each.  Attach them individually to the diagonal end of the scarf.

Eeyore Mane With Fringe Close-Up

Cut 12 strips of black yarn to 6″ each.  Attach them in pairs to the bottom of the tail piece.

Eeyore Tail With Fringe

Separate the strands of black yarn to make the tail a little “furrier”.

Eeyore Tail With Frayed Fringe

Sew white button to the bottom of the scarf at about the center of row 5 with black yarn.  Weave in all loose ends.

Eeyore Button CardEeyore Tail Attachment

Tie pink ribbon to the bottom of the tail.  Button tail to the scarf in the center of row two.

Eeyore Tail With Ribbon